
Introduction:
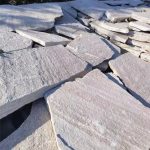
Cultured stone, also known as manufactured stone or faux stone, is a popular choice for homeowners, builders, and designers looking to achieve the aesthetic appeal of natural stone at a more affordable price. Cultured stone is made by blending cement, aggregates, and iron oxide pigments to create a product that closely resembles the look and feel of natural stone. This versatile material can be used for a variety of indoor and outdoor applications, including accent walls, fireplaces, exterior siding, and more. In this comprehensive guide, we will explore the process of installing cultured stone, from preparation to finishing touches.
Section 1: Planning and Preparation
Before beginning the installation of cultured stone, it is important to properly plan and prepare the area where the stone will be applied. This includes assessing the surface condition, determining the layout and design of the installation, and gathering the necessary tools and materials.
1.1 Surface Preparation:
The surface where the cultured stone will be installed must be clean, dry, and free of any loose debris or contaminants. In some cases, it may be necessary to apply a moisture barrier or wire mesh to ensure proper adhesion of the stone.
1.2 Layout and Design:
Consider the overall design and layout of the cultured stone installation, taking into account factors such as pattern, color variation, and joint size. Create a detailed plan or sketch to guide the installation process and ensure a cohesive and visually appealing result.
1.3 Tools and Materials:
Gather the tools and materials needed for the installation, including mortar mix, trowels, spacers, a level, safety gear, and the cultured stone itself. Make sure to choose high-quality materials and tools to ensure a professional and durable installation.
Section 2: Installation Process
Once the planning and preparation are complete, it is time to begin the installation of the cultured stone. The following steps outline the process of applying cultured stone to a surface, whether it be a wall, fireplace, or exterior facade.
2.1 Mixing Mortar:
Prepare the mortar mix according to the manufacturer's instructions, ensuring the correct ratio of water to mortar powder. Use a drill with a mixing attachment to achieve a smooth and consistent mortar consistency.
2.2 Applying Mortar:
Using a trowel, apply a layer of mortar to the surface where the cultured stone will be installed. The thickness of the mortar layer will depend on the size and weight of the stone being used, so refer to the manufacturer's guidelines for specific recommendations.
2.3 Setting the Stone:
Place the cultured stone onto the mortar bed, pressing firmly to ensure good adhesion. Use spacers to maintain consistent spacing between the stones and create a uniform joint width. Check the level periodically to ensure the stones are being installed evenly and straight.
2.4 Cutting and Shaping:
If necessary, use a wet saw or angle grinder to cut and shape the cultured stone to fit around corners, edges, or other obstacles. Take care to wear appropriate safety gear and follow proper cutting techniques to achieve clean and precise cuts.
2.5 Grouting and Finishing:
Once all the cultured stones are in place, mix a grout solution and apply it to the joints between the stones using a grout bag or trowel. Smooth the grout with a jointing tool or sponge to create a clean and uniform finish. Allow the grout to cure according to the manufacturer's instructions before applying any additional sealant or finish.
Section 3: Maintenance and Care
Proper maintenance and care are essential to ensure the longevity and appearance of a cultured stone installation. Follow these tips to keep your cultured stone looking its best for years to come.
3.1 Cleaning:
Regularly clean the surface of the cultured stone with a mild detergent or stone cleaner to remove dirt, dust, and other debris. Avoid using harsh chemicals or abrasive cleaners, as these can damage the finish of the stone.
3.2 Sealing:
Apply a stone sealer to the surface of the cultured stone to protect it from moisture, stains, and other environmental factors. Follow the manufacturer's guidelines for application and reapplication of the sealer to maintain its effectiveness.
3.3 Repairs:
In the event of damage or wear to the cultured stone, make repairs promptly to prevent further deterioration. Use a matching mortar mix to fill in cracks or gaps, and replace any damaged stones as needed to maintain the integrity of the installation.
check :
Cultured stone installation offers a cost-effective and visually appealing alternative to natural stone for a variety of indoor and outdoor applications. By following the proper planning, preparation, and installation techniques outlined in this guide, homeowners, builders, and designers can achieve a professional and durable cultured stone installation that enhances the beauty and value of any space. With regular maintenance and care, cultured stone installations can provide years of enjoyment and aesthetic appeal.